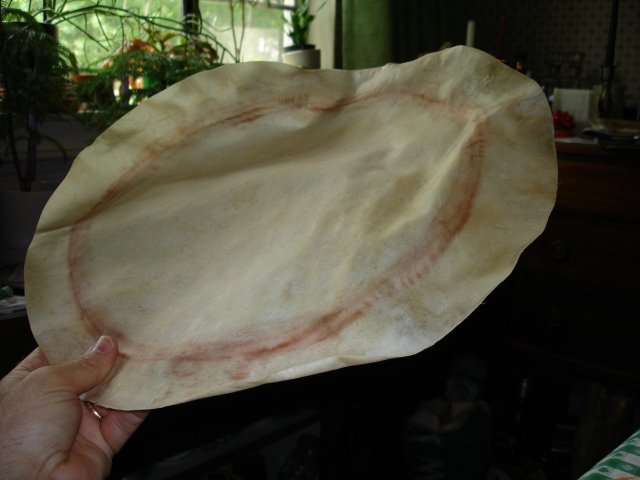
Now that I have enlarged the hoops, I am ready to make another attempt to stretch this banjo head. Here is the head again, stiff as cardboard.
It actually looks better than it did last time because I took some extra effort to dry it out flat. I soaked it again for about 10 minutes

Just for the heck of it, I broke out all the different kinds of flatware that I have. I even threw in the gravy ladle. You never know what is going to work. That white spot over the knife handle is just the reflection of the light bulb over the sink..... or maybe it is an omen from the Great Ra.
Once again, the head comes out limp.

I put the soaking wet head over the banjo rim.

Then I pushed the flesh hoop down over the skin and the hoop. It went on pretty easy this time. That could be a good sign.
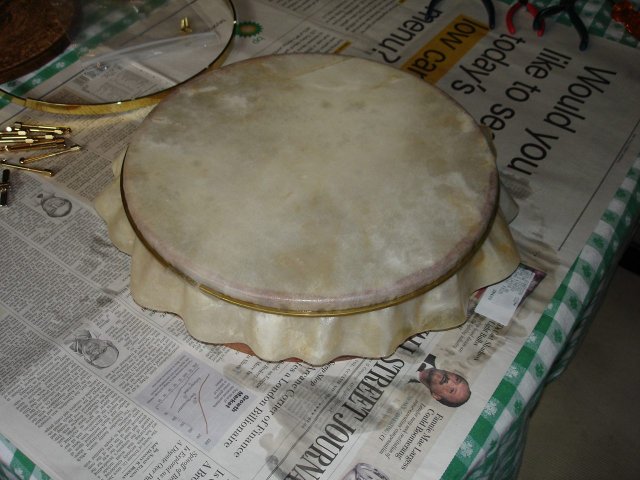
I have no photos of the next few minutes because all of my hands were occupied mounting the head. I put the tension hoop down over the skin and the rim. It was a snug fit, but not as tight as it was before. I then began to pull the skin back up through the hoop. It came easily in some places, and it would not fit through at all in others. The hoop is not round, so there are gaps some places and no gaps in others.
When I tried to tilt one edge of the hoop up to make clearance, the entire thing would pop off, and I would start over. I finally did what I tried before, basically I set the tension hoop loosely on top of the rim and pulled the flap up through. Once I got the skin through the hoop all the way around, I tried to push the hoop down over rim.
I ended up with the same result. No matter how hard I pushed, the tension hoop would not go down. If I pushed it down on one side, it would pop up on the other. I finally got frustrated and went and got my "persuader". That is a big, rubber mallet. I held one side of the hoop down on the pot and I whacked the other side a few times with the mallet. That seems to have done the trick. Here is a photo of it next to the "persuader".
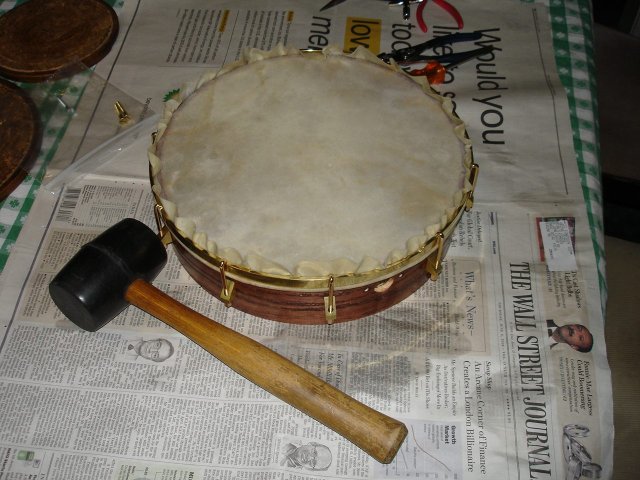
The rubber mallet does not seem to have damaged the hoop or the rim, and the assembly is finally together. The directions say to put the hoop down on the rim just barely so that it stands above it, and the hooks are just barely long enough to hold it. When I mashed it down, it got seated pretty much all the way down. The top of the tension hoop is just barely above the top of the rim. Oh well. It is what it is. At least it is together.
Since the hoop is already seated on the rim, I went ahead and put all the hooks on it. I hope there will be enough play left that I can get it tight enough.
There are a couple of problems with the assembly. Some of the notches in the hoop do not line up exactly with the hooks. I had to turn the hooks slightly to get them into the notch. I will have to check the shoes later to make sure that they are mounted vertically. Most of the hooks went in fine.
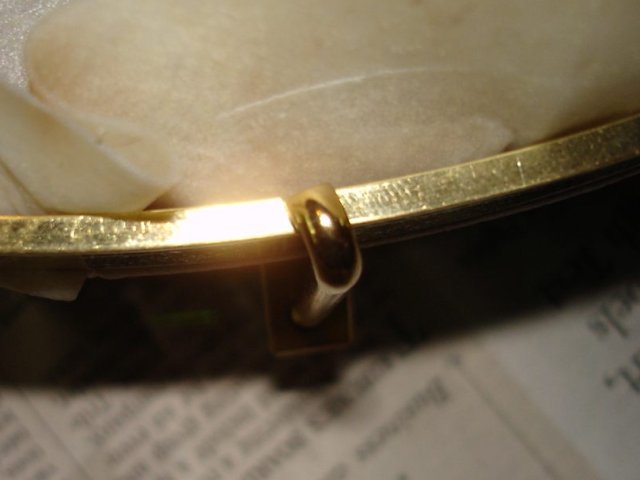
The other problem concerns the joint that I made at the back of the tension hoop. There is no rigidity there at all because I had to split the hoop apart to make it bigger. When I was tightening the hooks, the tail end of the hoop twisted. You can see it in this photo.
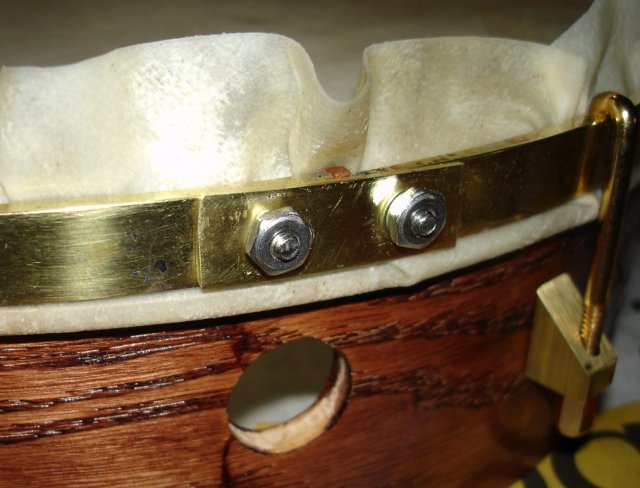
I adjusted the tension on those two hooks and it straightened out. I will just have to be very carefull making the tension back there even. I think that it will work out. My cobbled-up joint held up OK while being whacked with a mallet.
Now I need to let this whole assembly dry out. The next step is to trim the extra skin off and do the final tensioning of the hoop. Next week.
It took me about an hour to do this work.