Last week I capped and cleaned the rest of my gourds in order to save them from the mold. The last two gourds produced two small flower pots full of seeds, which I left sitting on the patio. The next day I came out and found this.
I think Mr. Squirrel was involved in this, although I doubt I could prove it. It could have been Mr. Skunk or Mr. Rabbit or even Mr. Raccoon.
Getting back to the banjo, the plan goes like this: I must cut two holes in the gourd through which I will pass the dowel stick part of the neck. That is how the gourd is mounted to the neck. There are many things to keep in mind while I cut the two holes. These must all be executed well if the banjo is going to play properly. Here is my list:
Here is a drawing of what I need to do.
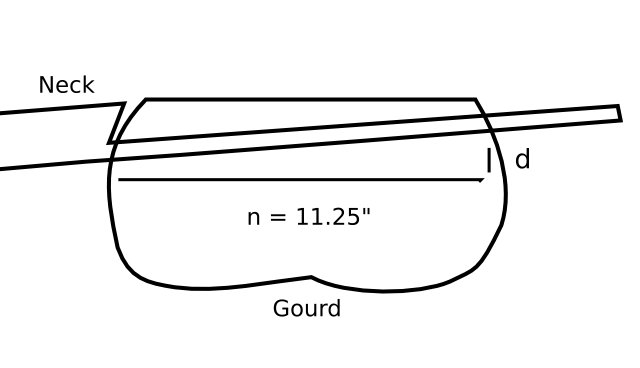
The drawing shows some measurements that I made to calculate the angle of the neck through the gourd.
The angle of the neck is exaggerated to illustrate the calculations I did. You can see that the position of the hole in the back of the gourd must be elevated compared to the position of the hole up by the heel of the neck in order to tip the neck down and put some angle on it. The questions which arise are how much of an angle do I want to have, and how much do I have to move the hole up in order to achieve that angle.
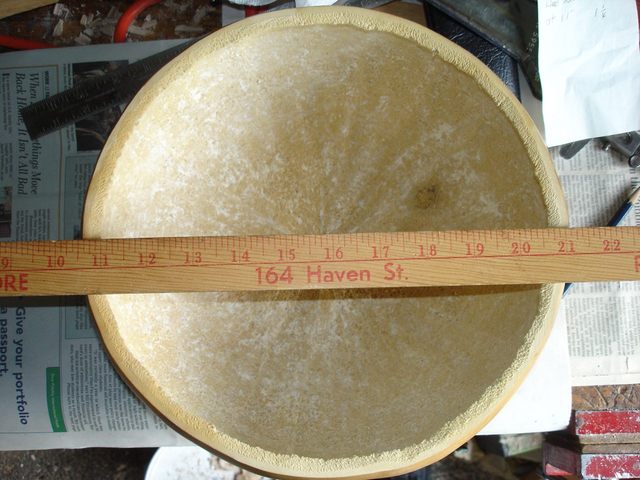
Here is how I measured the size of the gourd. I opened one of my clamps as far as it would go and placed it gently on the gourd where the holes will be cut.
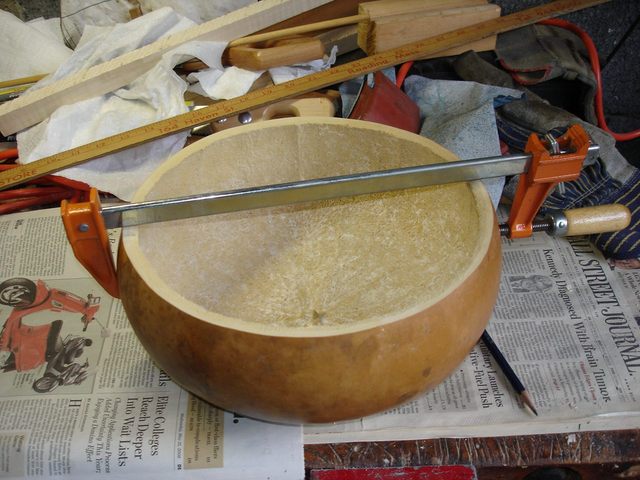
I screwed in the clamp until it just barely touched the gourd (I don't want to crush it). Then I took the clamp off and measured the distance between the jaws of the clamp.
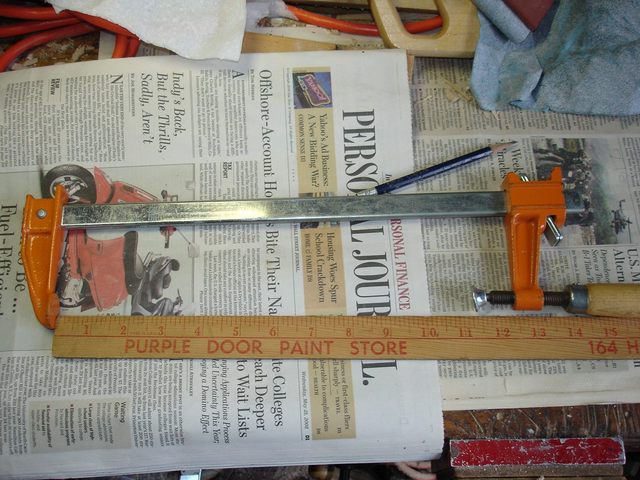
The result is about 11 1/4". So that is the size that I used in the calculations.
I decided that I want to make the neck angle 1°. On my previous gourd banjo I made the neck angle 2 1/2 degrees, and when I was done I had to make a really tall bridge for it to keep the strings from buzzing. So this time I am going to put less of an angle on the neck.
n = length of the tailpiece section = 11.25" inside the gourd.
a = angle of the neck
d = deflection upward of the rear hole
tan(a) = d / n = d / 11.25
I want to figure out what d is to provide a neck angle of 1 degree. We can go ahead and solve the equation to get.
tan(1°) = d / 11.25
so
d = tan(1°) * 11.25 = 0.196"
That is just over a 3/16 inch. Or we can try out some numbers for the position of the rear hole and get the following angles.
a = arctan(d / n)
For d = 1/8" a = 0.64°
For d = 3/16" a = 0.95°
For d = 1/4" a = 1.30°
I decided to place the rear hole 3/16" above the front hole.
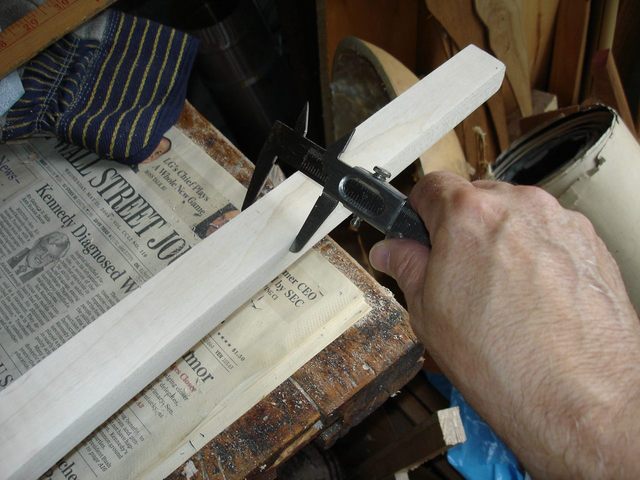
I now had to figure out what the absolute height of the front hole is. I did that by measuring the height of the neck at the heel.
I used my calipers to measure the distance from the finger board down to the bottom of the heel. That came out to be 2 9/16".
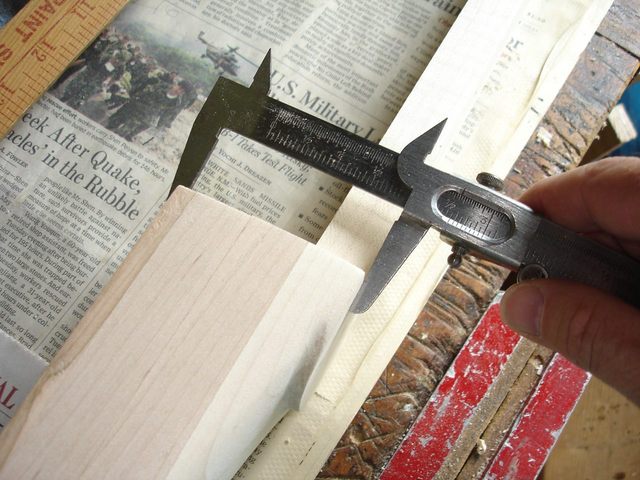
I also need to know how wide to make the holes. Since the dowel stick is tapered, the front hole will be wider than the rear hole. I measured the width of the front hole by measuring the width of the dowel stick at the heel of the neck and got 1 11/16". I measured the width of the rear hole by marking the dowel at 11 1/4" from the heel and measuring the width there. It was 1 1/4"
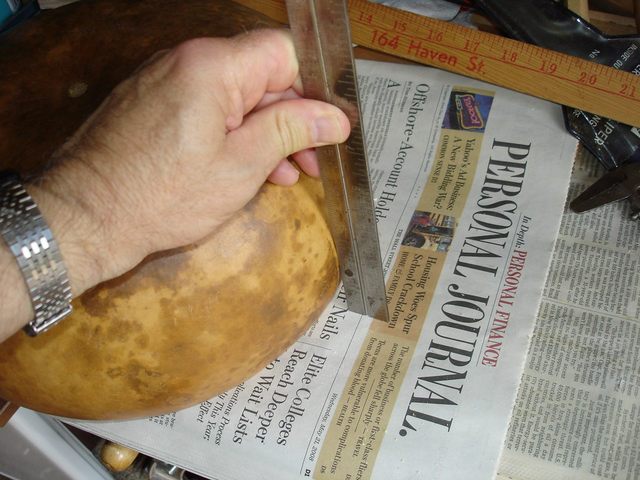
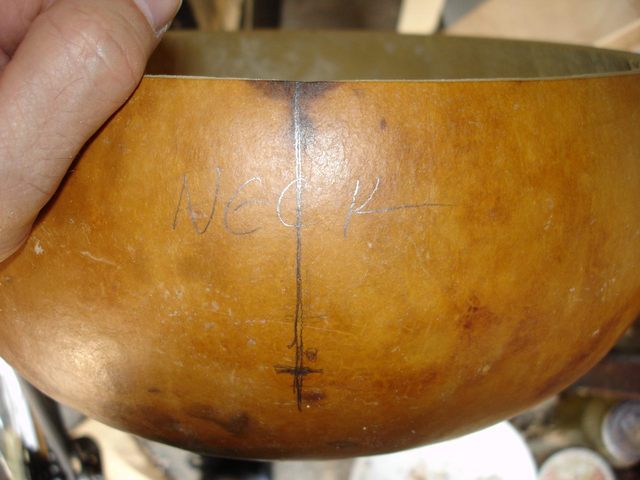
I also have to put the neck through the center of the gourd, so I put my yardstick on the top of the gourd and eyeballed it over the center stem of the gourd.
I marked the top of the gourd along the upper edge of the yardstick and then dropped vertical lines from the marks down the sides. To measure the distance from the top of the gourd I turned it over on the bench and measured up from the bench to the depth of the neck, 2 9/16".
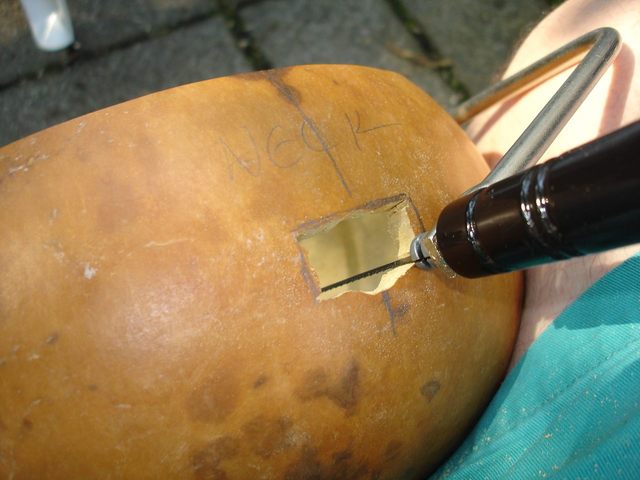
Here is the line and the mark that I made at the location where the bottom of the neck heel will be. I wrote the work "NECK" on the gourd so that I would not get confused later about which end of the gourd this is.
Here is the tail side where I need to elevate the hole so that the neck will have an angle on it.
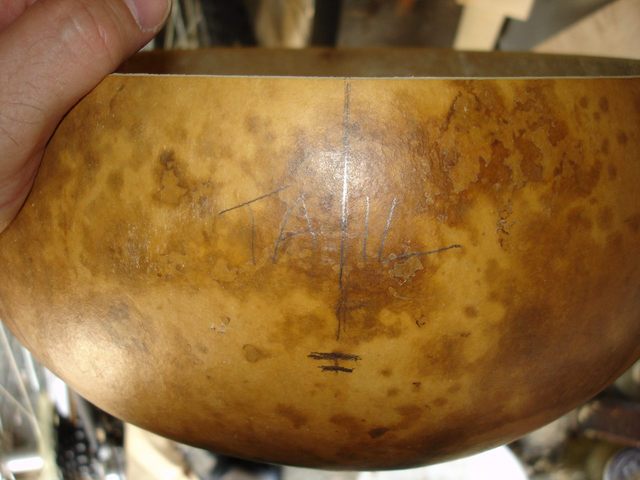
I wrote "TAIL" on this side to keep my poor old brain from getting confused. The vertical mark was made using the same measurement as on the other side. But you can see that I have measured up 3/16" from that mark and made another one. The higher mark is the one I used to cut the hole.
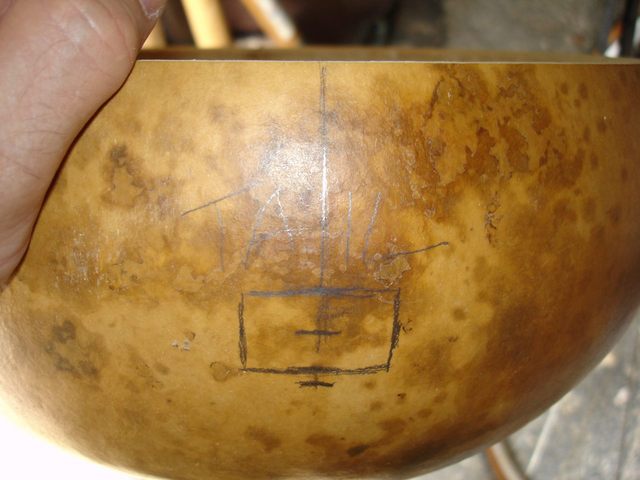
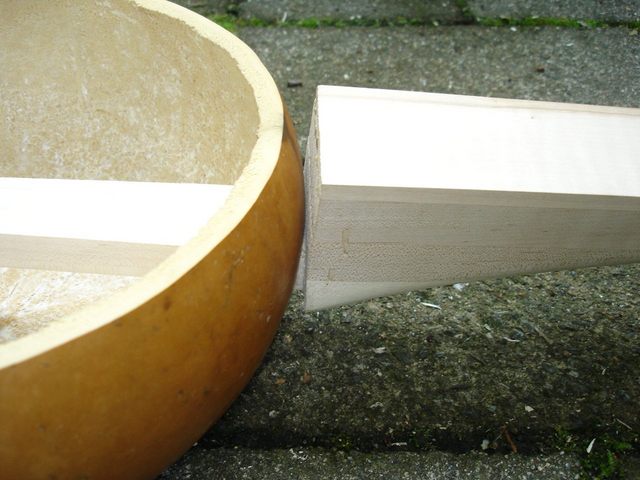
I drew a box on the gourd with the dimensions of the dowel stick where it will be seated in the gourd. This is placed with its bottom on my mark and is 3/4" tall (the standard depth of my lumber) by the width of the dowel (1 11/16"). I made the box slightly smaller than what I had measured on the neck so that I can gradually increase the size of the hole after I cut it and make a snug fit.

I did the same thing on the tail side, but using the elevated mark and the narrower measurement of the dowel width (1 1/4") taken 11.25" from the heel.
I am ready to cut the holes. Here are my tools.
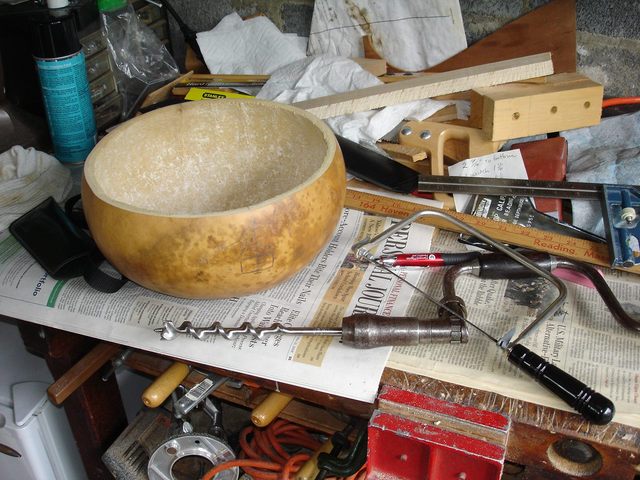
The brace contains a 3/4" bit. Since the neck wood is 3/4" thick, I can start the square hole by making a 3/4" round hole. That just works out nicely. I braced the gourd between my legs and drilled out the center of each box.
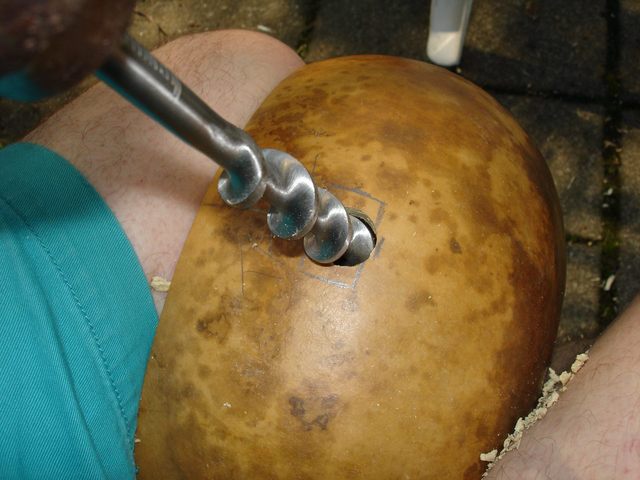
The brace cuts very quickly and cleanly. I drilled holes on both sides of the gourd and here is what I had.
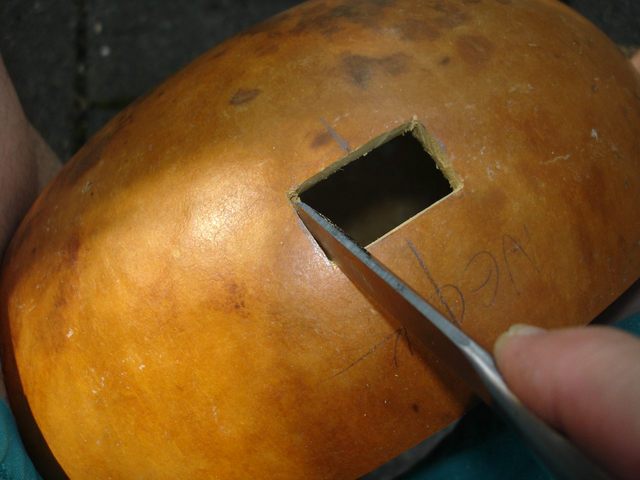
I threaded my coping saw through the hole in the gourd so that I could cut it close to its final recangular shape quickly.
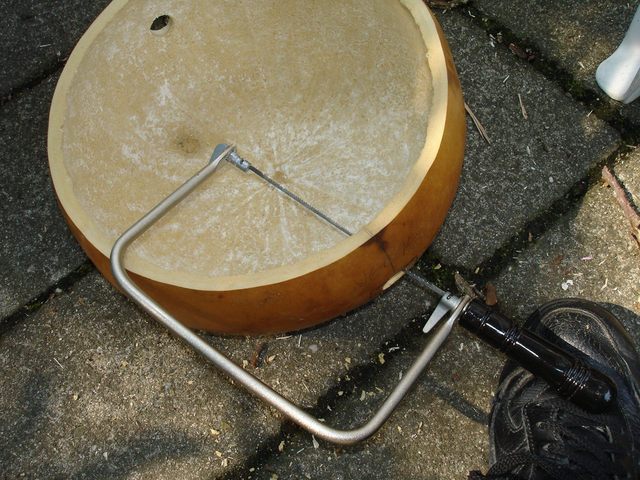
Here it is with most of the wood hogged out of the neck side of the gourd.
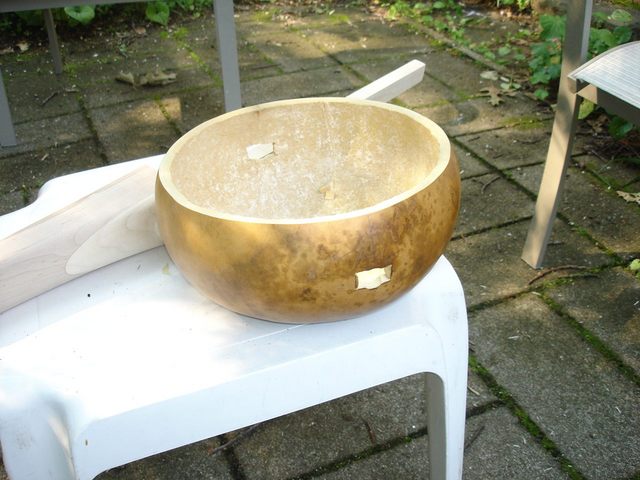
After sawing out both sides of the gourd, it looked like this:
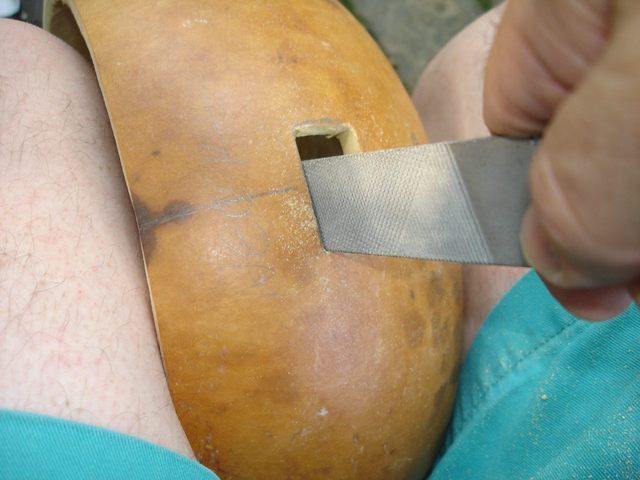
I held the gourd between my legs and used the chisel to pare away the wood until the hole was truly rectangular. I had to be.. um... careful doing this work. The gourd wood is soft, and the chisel cuts it easily.

Once I had the holes roughed in, I used the shoe rasp to enlarge them slightly and make them even. I want the dowel stick to be a snug fit in the holes, but not too tight so that it will bind.
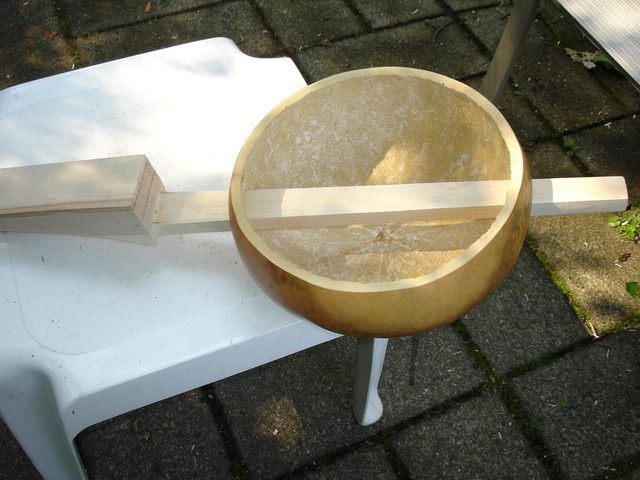
After I had the holes cut to their nominal size, I put the dowel through them to see how I had done.
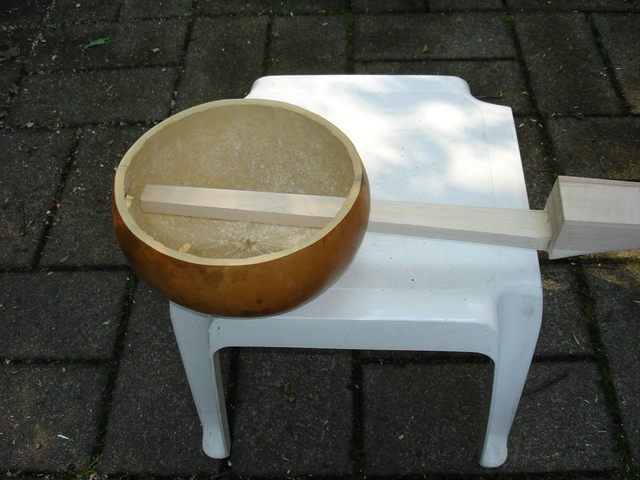
Hmmmm. Not bad. It did not go all the way through because the holes were still too small. But that was planned. Then I had to slowly increase the size of the holes where the neck was binding until the neck goes all the way through and is a snug fit. It is an iterative process; cut a little, then try the fit; cut some more, then try the fit.
Part way through I stopped and checked to make sure that the finger board is parallel with the top of the gourd.
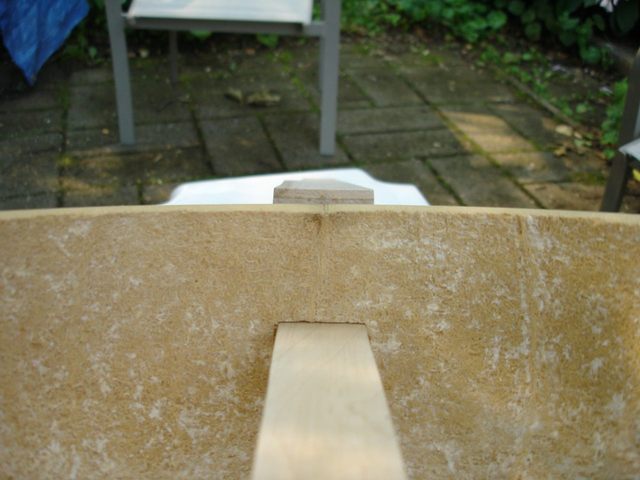
If the neck slants to the left or the right it will not play right, so I want to make sure that it is even. It looks pretty good so far. This is actually easier than it might appear. As long as the sides of the rectangular holes remain parallel to the upper edge of the gourd I should be OK. Besides, the holes are about the right size vertically, so I am mostly paring off wood on the edges of the holes to make them wider.
Cut and fit; cut and fit; cut and fit. The work is tedious, but it feels good to sit outside in the warm air and doing it. This is the best part because stuff is happening as I do it.
I am making progress. I need to be careful that both holes remain snug on the neck. I don't want one of them to be loose and the other one tight or the neck will move around once it is mounted on the gourd. So I am working on both holes at the same time and looking for light leaks between the sides of the dowel and the sides of the holes.
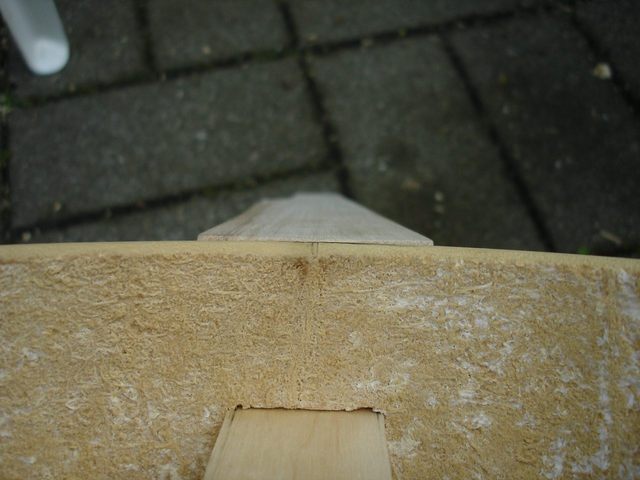
Cut and fit; cut and fit; cut and fit. Finally, the heel of the neck is snug against the side of the gourd.
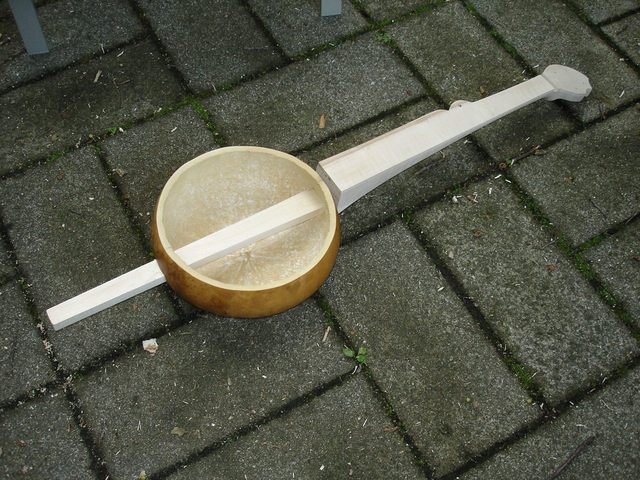
Here is a closeup of the heel and the gourd.
That's it. Whatever it is, this is what I get. The joints look pretty good. I wonder what kind of neck angle I got out of it. I grabbed a yardstick and put it on top of the gourd.
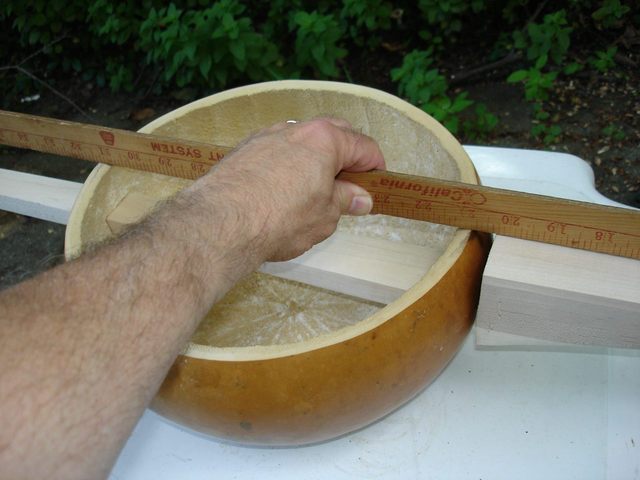
Then I measured how far the yardstick is elevated from the neck down by the nut slot. Here is a closeup.
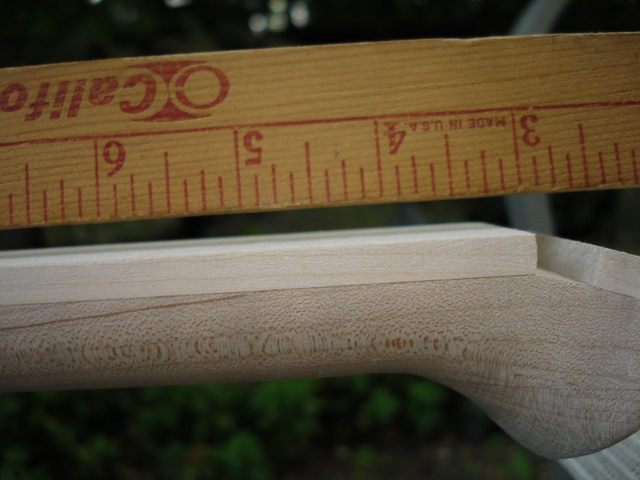
I measured the distance at just about 1/4". I also measured the distance between the place where the yardstick is coming off of the gourd to the nut slot and got 19 1/2". From those numbers I can calculate the angle of the neck. I re-accomplished some of the calculations that I did before, using the measured values in the formulas.
a = the angle
tan(a) = d / n = .25 / 19.5 = 0.01282
a = arctan(0.01282) = 0.7345°
That isn't quite the 1° angle I was looking for, but it is close enough. It is probably better that the angle be a little less than what I started out to do instead of more in order to keep the strings from buzzing in humid weather. I think I am happy with this outcome.
One last check. I wonder how I did keeping the neck level with the plane of the head.
Wow! That's not bad at all! It looks dead on to me.
That is it for today! This was a good one. I am happy with the outcome of this. If you take a look at the joint between the neck and the gourd again you can see that I have to do something to make the heel of the neck fit better to the gourd. My next trick will be to carve the heel of the neck into a concave shape to fit the convex shape of the gourd.
I spent about 2 hours doing this work.
Original post date July 27, 2008