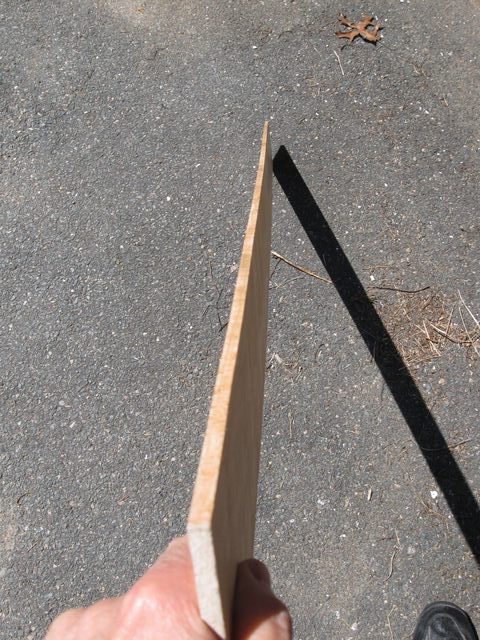
We finally had a warm, Spring day on a weekend, so I decided to do some work on the banjo. To be more specific, I decided to work on the neck blank. But first, I took another look at the finger board that I straightened out last time. It has been a couple of weeks and I wondered if it had warped again. Here is a photo.
Well, that's not bad at all. There are some little ripples in it, but the big bends are still gone.
In anticipation of having to smash the finger board flat, I went looking for a caul I could use that would allow me to apply enough pressure with my clamps to do that. I was looking for a heavy piece of steel or aluminum. After failing to find anything at the Big Box stores I went to our local independent hardware store and found this:
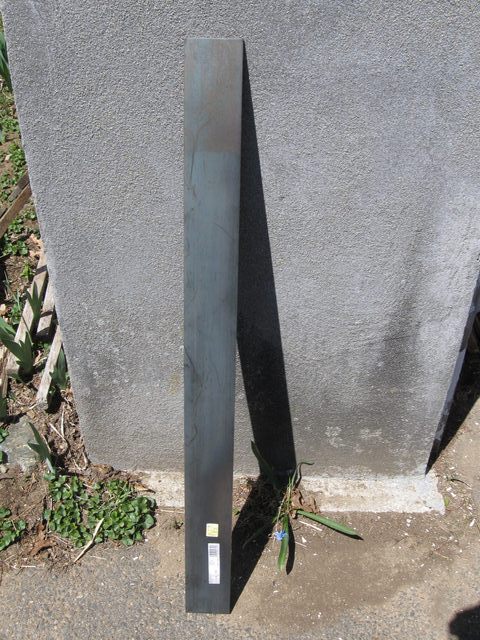
That is a flat piece of steel that is 1/8" thick by 3" wide by 3 feet long. I was hoping for something a bit thicker, but that is the thickest and widest piece they had. The lumber that I work with is 3 1/2" wide, so the 3" steel caul should do the trick. Before I took the photo I took some detergent and steel wool and scrubbed off any oil that might be on it. The last thing I need on my banjo wood is petroleum products. It looks like the steel is blued anyway, so maybe it won't rust.
On to the neck blank. I printed out my plans for the neck, which you can see here. I have no wood to waste on this since I am trying to cut the entire neck out of one 6' piece of lumber, and I have made use of every inch of it. I want to make sure that I cut each piece to the proper length and in the proper order. "Measure twice and cut once", as the old timers used to say.

In order to get the grain and the figure to line up I plan on cutting the pieces in order, beginning at the peghead end and ending with the tailpiece. That is what I did, and here is the result.
In the photo I have just put the blocks of wood next to one another on the bench. Nothing has been glued yet. It looks like the plan. The small piece which you can see standing up to the right of the plans, is about 5" long because the board was actually longer than 6'. I need 4' out of it, which is a good thing because there is some checking at the end of the board that I will have to cut off. You can see in the photo below that I have used the arrows and numbers on the board to identify the bottom of it and also the sequence of the pieces.

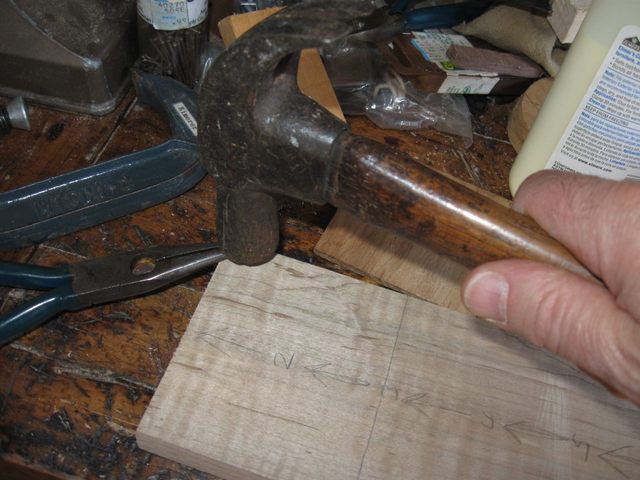
I decided to glue the boards starting at the peghead end. To keep them aligned while the glue dries I used wooden pegs in holes. The pegs will be cut away when I cut out the shape of the neck so they will not be in the way. Since I make the pegs out of toothpicks they will pose no hazard to my saws. In order to align the holes that the pegs will go into I made some steel pins by cutting a small nail into pieces. Then, I placed the steel pin on a corner of the board.
and tapped it into the wood using a hammer.
Then I lined up the two boards and tapped the top one gently to mark it with the pins that were pounded into the lower board.
Then I pull out the pins. You can see one of the marks on the small board at the top of the photo.
Now I need to drill out the holes for the wooden pegs. I used a drill bit that was 3/32" and put a flag on it so that I would know how deep to drill.
Drill out one corner.
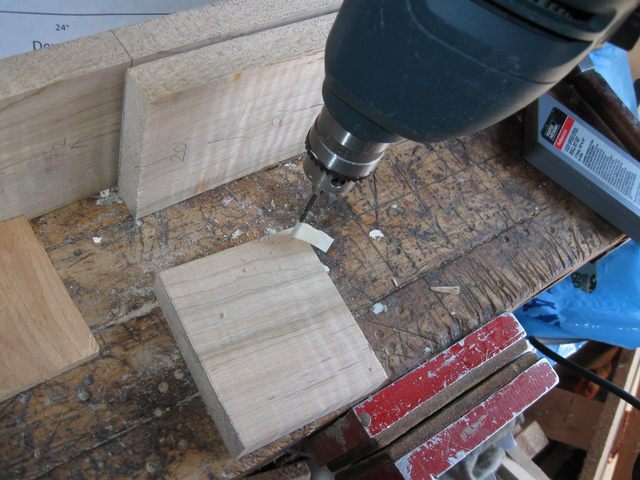
Drill out the other corner.

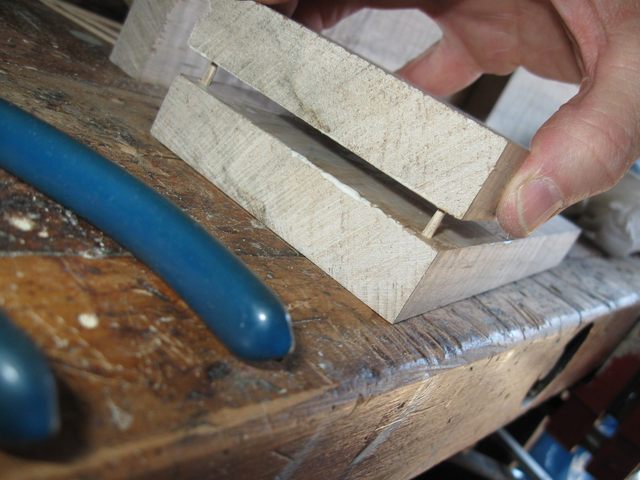
Stick the toothpicks into the holes.
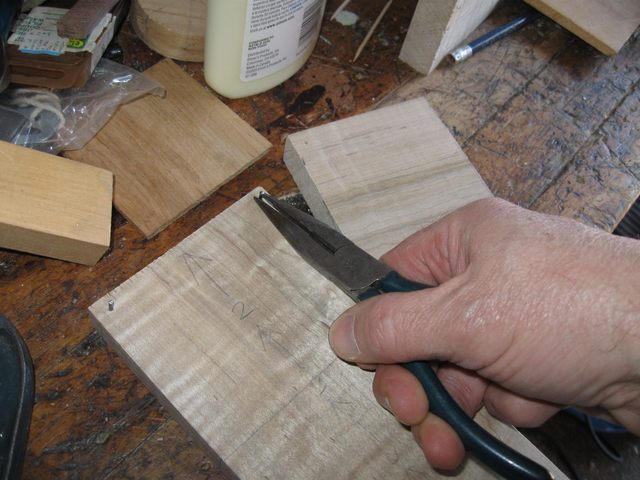
I have put both pegs on the same end of the board instead of in diagonally opposite corners to make sure that they will be in waste wood when I cut out the shape of the peghead.
I eyeballed the length of the pins to be twice the depth of the holes I had drilled and then rounded off their tips with some sandpaper.
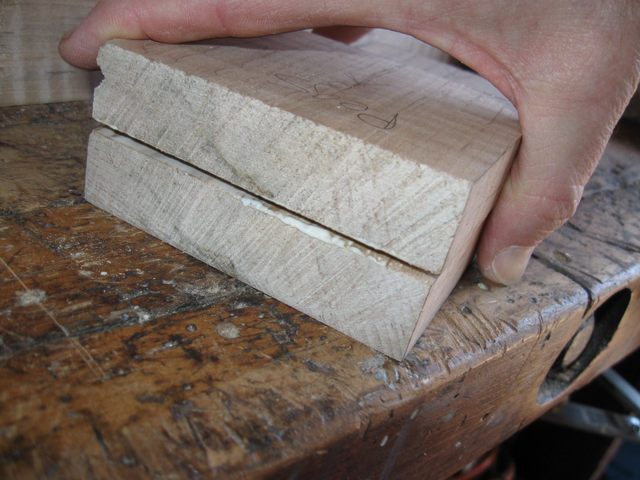
I removed the pegs from the wood and put them aside. Then it was time to put on the glue. Squeeze a squiggle of glue onto each board.
I spread it out using my fingers, which makes a mess of my fingers, but then.... that is what hand cleaner is for.

The goal is to get an even coat of the glue on both surfaces, like this:
Put the pins in one board and line up the other board so that the pins go into the holes like this:
Push the two boards together, sandwiching the glue between them.
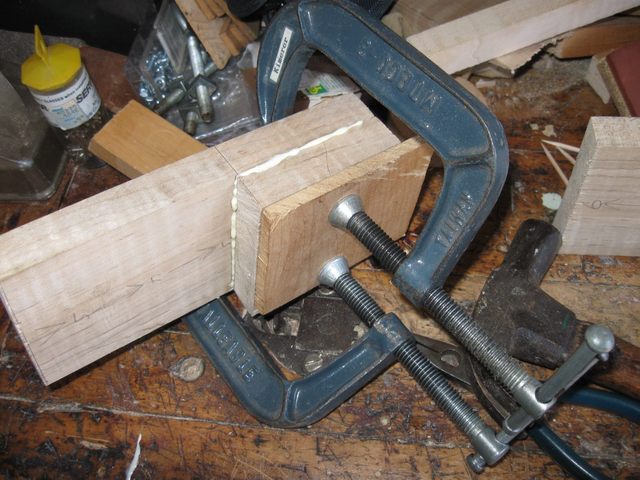
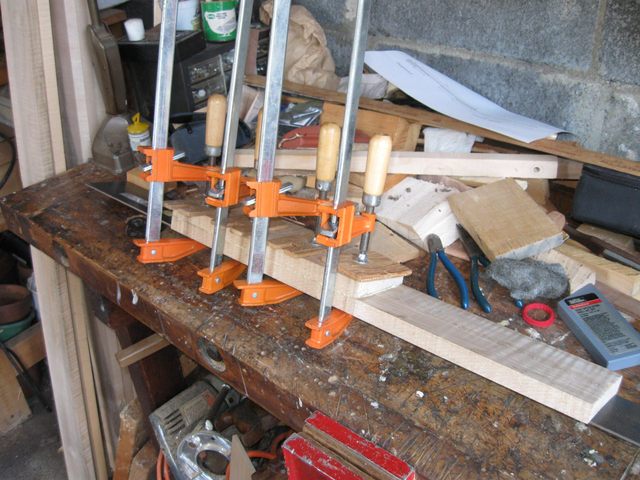
Clamp the two boards together using C clamps.
I left that setup to dry while I did the same thing to two boards at the tailpiece end. When I marked and drilled the tailpiece boards I did put the pins diagonally opposite, but I was careful to keep them close to the edge of the board. On my previous banjo I put them too far in down by the heel, and one of the pegs was visible after I cut the neck to shape. You can see the boo boo here. Scroll down to the bottom of the page to see the ugly pin holding the neck together. Looks like a worm hole. So that is what I will tell people.... the wood had a worm hole in it.
Anyway, to avoid that mistake again I was very careful to put the pin close to the edge of the wood. The heel of the neck will be about 2 1/2" wide and the wood blank is 3 1/2" wide so that is an inch of wood to be removed, or about 1/2" on each side. I tried to keep the pin within 1/4" of the edge.
Here are the boards ready to go. The steel caul is standing up behind them on the bench.
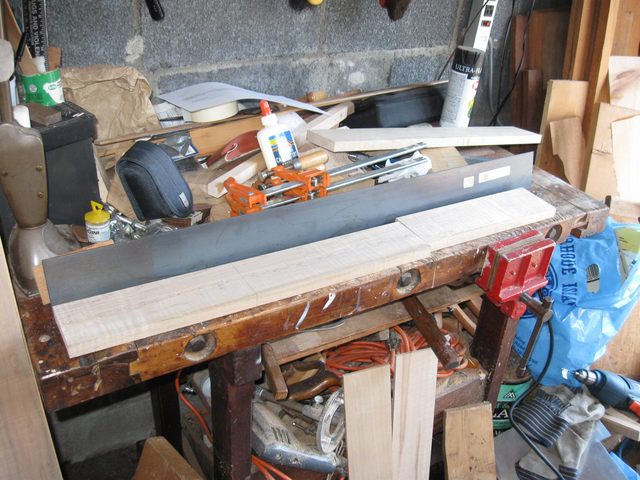
I put the boards together and clamped them up using the steel caul on one side and some scrap wood on the other.

|
|
After the glued dried for a couple of hours I glued the first peghead piece to the neck piece.
Then I glued the dowel piece to the neck as well. Here it is waiting to dry.
That's it for the day. Now to let it all dry so that I can cut it to shape. I spent about 3 hours making the neck blank.
Original post date April 22, 2008